From Overview, click Template. You can scroll down and choose other Templates that offer a little different look. To add a custom background from a third party site, Picture Window is the easiest to use.


Template Designer is great because you can see your proposed changes below the grey box. Just scroll down!
You can choose from different templates and, if you have time, play around with them. The changes won't take effect unless you click Apply to Blog. (You can always click Back to Blogger and go back to your old look.)
To add a "stock" Blogger image as your background, click Background.

Scroll through and look at the images that might apply to your blog. Click on the one you want, then click the orange Done.
Click Apply to Blog, then click Back to Blogger and you're set.
If you want to add an image from a third-party site, we need to do a little more work. Go back to the Templates and change to Picture Window for now.
Open up a new browser window and let's look for backgrounds!
There are literally thousands of templates you can use, many of them FREE. In fact, this cute background I'm using is from The Cutest Blog On The Block. You can see their logo in the top left corner of my pages. I could take it off, but I don't mind advertising for them because I like their stuff.
Two of my favorite freebie sites are Smitten and Cutest.
Surf around those sites (Free Backgrounds) until you see something that you think you might want to try. Some of them have 3-column templates, but for now let's just stick with the 2-column ones. (If it doesn't specify columns, it's probably 2-column).
When you've chosen the one you want to try, click on it and some crazy characters will appear underneath it. This is the code that will re-program your background.
Highlight that line of code and Copy it (if you have a mouse, right-click, then select Copy)

Notice the line at the top that says, "Our backgrounds work best with..." See why we changed it?
Now go back to the tab or window that has your Layout page.
Click Add a Gadget

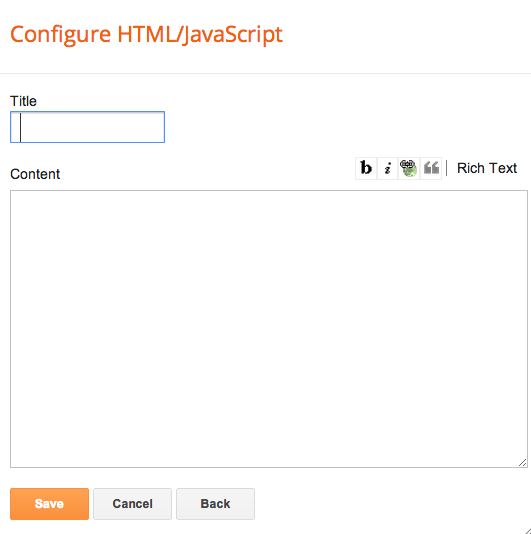
When the pop-up window appears, scroll down until you see HTML/JavaScript and click that.
When that window opens, position your cursor in the Content box, right click and select Paste.
Click Save and return to the Layout Page.
Your new gadget will be on the top of the sidebar, but it can go anywhere. I suggest putting it in the footer. It'll look like an advertisement. Click its box, then drag and drop it where you want it.

Now scroll up to the top and click Preview. How do you like it? If it's ok, go back to the Layout page and click Save and enjoy your new look! If you don't like it, find another one and Edit your gadget. Just be sure you delete the old code before you copy in the new.
Check Blogmama Susan for posts on how to customize your blog even more with fonts and header text and header images!